How to Add, Remove, or Replace a Logo
Adding a Logo
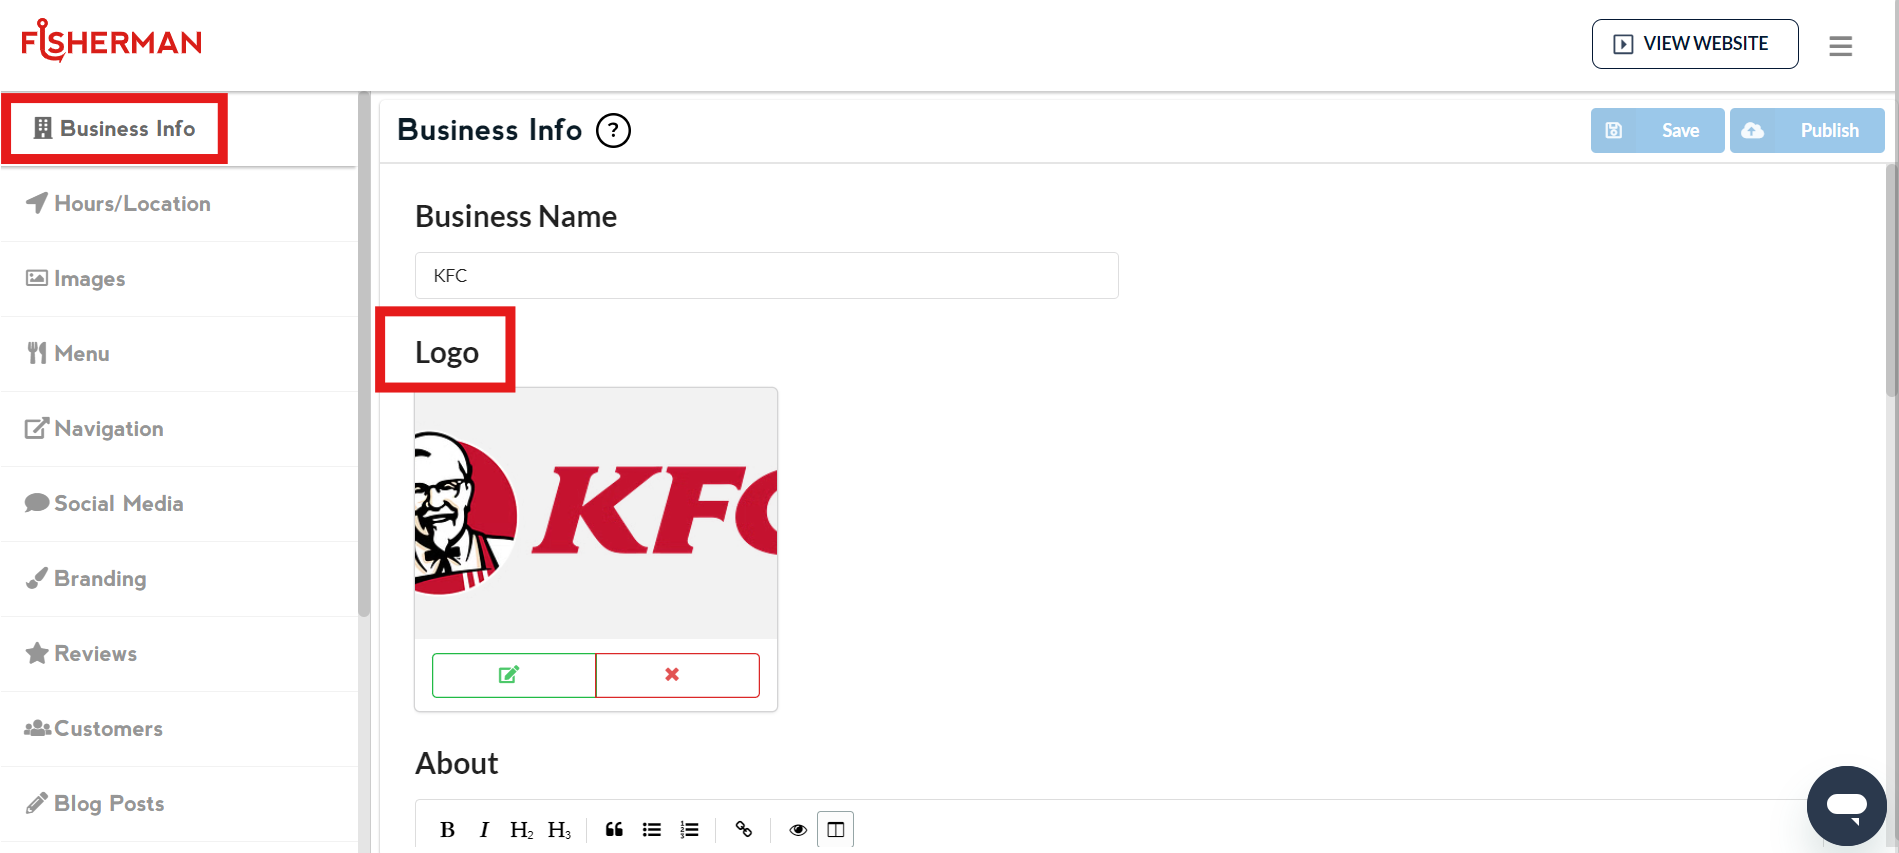
Click on “Business Info” in the left-hand menu of the dashboard.
Under the field titled “Logo,” click on the green “+” sign.
Select the file from your device and click “Choose for Upload” in the bottom right corner of the pop-up window.
Note: Ensure that your logo is a PNG or JPG file; otherwise, it will not display properly on your website.
Click “Save” in the top right corner of the dashboard.
Click “Publish” to apply the changes.
Removing a Logo
Click on “Business Info” in the left-hand menu of the dashboard.
Click on the red “x” below your logo image.
Click “Save” in the top right corner of the dashboard.
Click “Publish” to apply the changes.
Replacing a Logo
Click on “Business Info” in the left-hand menu of the dashboard.
Click on the green pencil and paper icon below your logo image.
In the pop-up window, select your new logo file from your device and click “Choose for Upload” in the bottom right corner.
Click “Save” in the top right corner of the dashboard.
Click “Publish” to apply the changes.